
Many years ago, when I was swamped with running a startup in Delhi, to help clear my mind, I picked up a new side project - baking sourdough bread! I had a wonderful mentor in my Italian friend, Francesco, who graciously put down in words how he made his sourdough starter and from that, sourdough breads. I’ve taken his instructions and expanded on them a little here. It’s not that difficult but it does require a time commitment to nurture your starter and bake each bread, which I can assure you is a highly fulfilling experience. I first describe how to make sourdough starter from scratch and then how to bake a sourdough bread from your starter.
How to make sourdough starter from scratch
Making your own sourdough starter is pretty easy. The idea is that you mix, in a small bowl, the same amount (grams or ounces) of water and flour (it’s better with whole wheat flour) and let it ferment in a controlled way, that is by ‘refreshing’ it regularly, which means taking half out and adding again into the bowl equal parts of water and flour (use the same flour throughout the process). The starter is ready to use for baking when it doubles (and bubbles) in volume in 2 - 3 hours after it has been refreshed.
Please note: high room temperatures - above 35 C (95 F) in particular - do not work well with sourdough, as above a certain temperature the chemistry works differently and you have different things developing in the fermentation. Low temperatures are OK, it just takes longer to double in size. 22 - 25 C (71 - 77 F) degrees is the ideal temperature range.
Steps to make starter
- Mix 100 grams (g) of flour and 100 g of water in a bowl. It should be smooth with no flour lumps.
- Let it sit at room temperature (not in the fridge) till it starts fermenting, which should take about 2 days, and in that time, mix it thoroughly a few times a day.
- After the second day, ‘refresh’ the starter twice a day - remove half (100 g) of the starter and discard it and mix in 50 g of flour and 50 g of water.
- From day 3 to day 7, monitor the smell, it will stink like it’s rotten, then like alcohol (sharp smell), then like cheese gone bad, then finally like fermenting grapes.
- On day 7, after you refresh the starter, it should double in volume within 3 hours, if so, then it’s ready to be used in baking a bread. If it doubles in volume before day 7, it could be ready but there’s no harm in going on till day 7 as it will only enrich the sour flavor of the starer.
How to make sourdough bread from starter
Proofing the sourdough bread
- Take 100 g of starter into a new bowl.
- In the old container, refresh the starer by adding 75 g of whole wheat flour (atta in Hindi) and 75 g of water. Mix well, put the cap on and leave it out for 3 hours or till it doubles in volume.
- In the new bowl with the 100 g of starter, add 100 g of bread flour (maida in Hindi) and 100 g of water. Mix well till there are no lumps (should be smooth) and leave it outside, covered with a plate, for 2 - 3 hrs.
- After 3 hrs, in the bowl with the original stater, confirm there are bubbles on the starter base, then you can put this 200 gm of original starter in the fridge to be used for your next bread.
- In the new bowl (after 3 hrs from step 3) you will see that it has grown and bubbled. When the surface starts collapsing in some spots, it’s time to move on.
- You will need about 600 g of bread flour (or other flours) for one big bread (100 g going in the bowl now, plus 500 g in a few hours, plus some to ‘dust’ the bread). Make sure you also have a large salad bowl, and a clean cotton cloth (like a cheese cloth or an old pillow case) to cover it.
- In the new bowl, where you have 300 g of fresh starter, add 280 g of water and 250 g of bread flour (you can substitute some of this with multigrain flours like millet or soy flour here). Mix! The result should be dense but still liquid. I’ve found that mixing in alternating small quantities of water and flour makes this a frustration-free process. Start with a little water first, get the dough liquid-y, then mix in some flour, mix it in thoroughly, then add more water, keep repeating.
- Now add 10 - 15 g of salt and any seed (like sesame, poppy, chia, flax, etc.) you want to have in your bread, say 2 or 3 tablespoons total. Then mix well till you see the seeds evenly spread in the dough, which should take about 1 - 2 mins.
- Now add another 250 g of bread flour (or other flours) and mix till all the flour is absorbed. This might get tough, so you can use a butter knife or even your fingers to help mixing (keep taking from the outside and push it into the middle). After that let it rest for 30 mins, covered with a plate so that the top layer does not dry out. What happens while resting is autolysis, a magical trick (or science) that in 30 mins will turn your mix of ingredients into one beautiful piece of dough - ready to be kneaded.
- After 30 mins, you probably already saw that the dough looks like dough - one mass rather than a mix.
- No-Kneading process:
- Sprinkle flour on a clean kitchen table
- ‘Pour’ the dough on it
- Sprinkle flour on top
- Shape (flatten) into a square
- Fold the four corners towards the centre
- Do Step 3 to 5 again
- Shape the dough into a ball
- Let it rest for 10 mins
- In the meanwhile put a cotton cloth in the large salad bowl, and sprinkle flour evenly on the cloth
- Put the ball of dough in the bowl with the cracked part on top and close the cotton cloth over it.
Baking the sourdough bread
- Let the dough ball rest and rise at room temperature for 2 - 3 hrs.
- Once the dough has doubled in volume, start pre-heating the oven at the maximum temperature setting with both the top and bottom elements on.
- When the oven has pre-heated, spread a thin layer of flour on the baking pan. Now, very gently and slowly, tip the dough onto the baking pan so the cracked bit, which will be puffed, will be at the bottom. Slowly pull the cloth off, making sure not to rip the surface of the dough. Touch it as little as possible - it should not deflate. No shaping by hand, moving on the pan by hand or touching, or it will collapse. Remember to move the dough onto the pan just before you put it in the oven. Don’t leave it out in the pan for too long or it will start settling.
- You can cut a few slits in the top of the bread to help it expand. Get a razor blade and make parallel cuts or criss-cross cuts into the bread. You can cut about 1 cm into the bread (do this after you have baked a few breads).
- Put the baking pan in the oven and set the temperature now to 200 - 225 C (390 - 440 F) and bake it for 30 mins.
- After 30 mins, to check if the bread is done, take it out, flip it and knock - if it makes a sound as if it was hollow, it’s done. Otherwise try another 15 mins.
- To get a nice brown crust, after 30 mins, you can sprinkle a little water on the bread and put it back in for 10 - 15 mins.
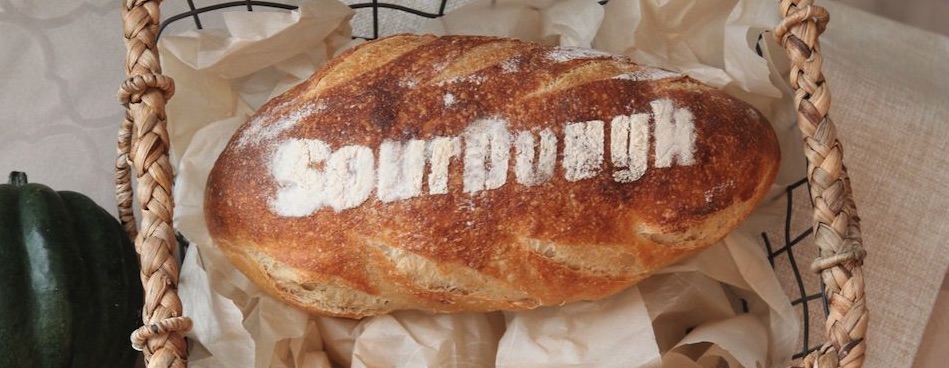
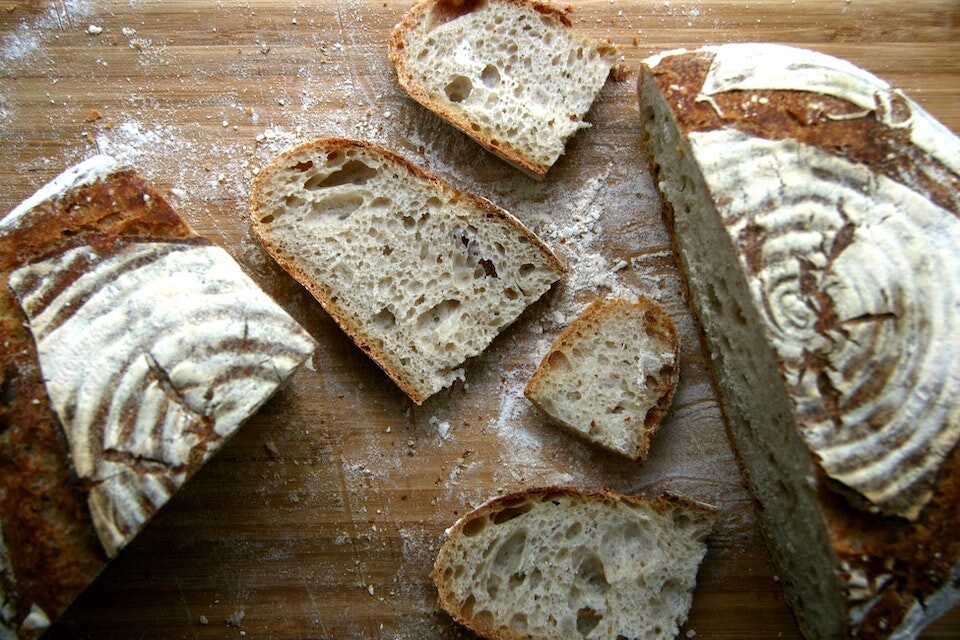
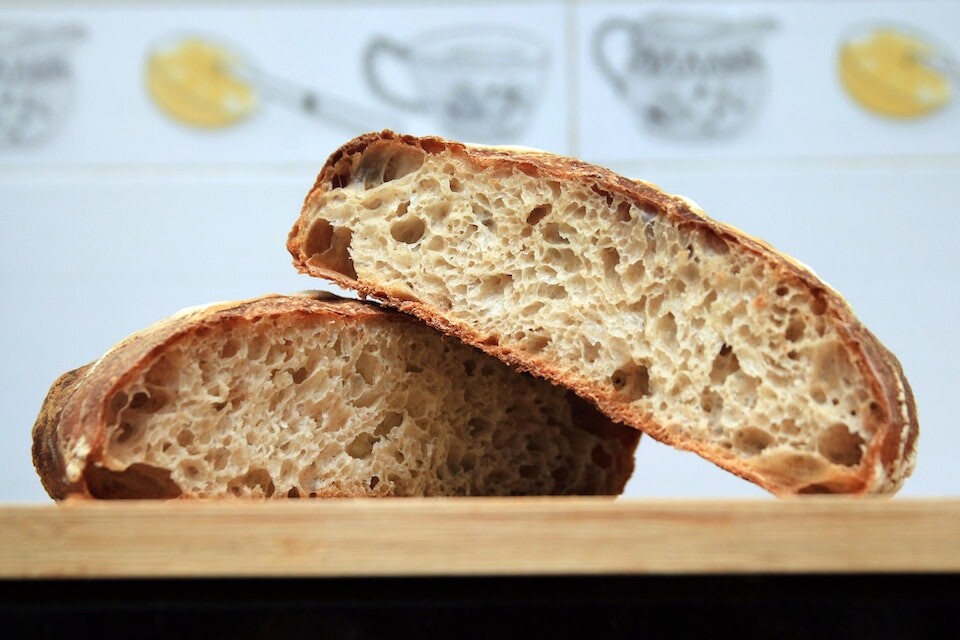
- When it’s done, cut and eat freshly-baked sourdough bread!
